Be a lamb and forget the rain for a moment. Didn't you feel a hint of fall in the air before all this madness descended? I don't want to get ahead of myself, but I could swear the subtle breeze and lack of humidity I encountered on King Street a couple nights ago suggested that the seasons may be changing. And the heart of the makeup artist in me began to pound! There is nothing that I love more than when the weather allows my Southern darlings to play with makeup and actually wear it. After all, who in her right mind would dare put on more than a smidge of lip gloss and mascara during the summer months in our beloved Charleston?
So as you ponder the idea of what suede shoe you might pick or pull down your cashmere wrap from the closet, I dare you to do this, too: reach for a classic black eye pencil and think smokey and sexy light. That's right. Everything comes in stages, from minimal to extreme, and so should your look, your makeup.
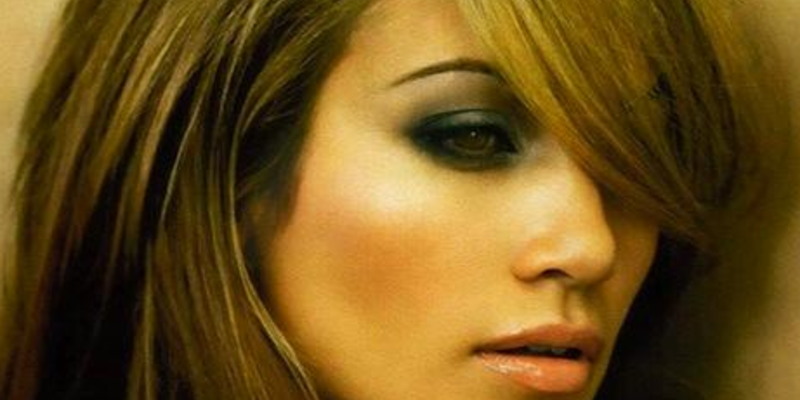
Be playful but not over-the-top as we welcome in the look of Fall 2012 with our makeup brushes. Flirt with the ideas that you might have gotten from the runways around the world, but start small and realistic. My suggestion would be a clean smokey eye that can be worn day and night and will hint of sexy, not slutty.
HERE'S HOW
1. The first step to all eye makeup application should always be to apply the perfect eye base from the lashes to the brow with your finger or a brush. This will ensure that the time and effort that you put into your application lasts and that your look lasts all day with no pesky creasing.
2. I always start a smokey eye by lining the lower lid with a smudge brush going from the outer corner of the eye to the inner, getting narrower as I go. By lining the lower lid first, I can gauge the amount of drama as I go. I find most women are unsure whether or not to line the lower lid at all, so for a more dramatic look, this is a good place to start.
3. Then, taking a cake liner, I line the the upper lash line at the root of the lash. This is the fabulous technique that Laura Mercier perfected call "tightline" that will give the look of fuller lush lashes and defines the eye.

I then line above the lash line using the same technique to really bring on the drama, while keeping the line as fine as possible.

ACP Tip: Don't worry about the line being perfect. Remember that the key to a smokey eye is to smudge it, so you are allowed some room for error.
4. I place the dark color along the lid with a precise brush rather than in the crease, which can sometimes become too theatrical or look a bit drag-queenish. Using the same technique as you did with the liner, start from the outer corner of the lash line, keeping in mind the further you go, the more dramatic the finished look will be.

By placing the darker color in this manner, you will be able to achieve a wearable smokey eye; whether it is a smoldering gray or a beautiful brown, you will find that your eyes will look more defined and more beautiful. Those around you will compliment you, not your makeup. ACP Tip: If you must apply a crease color, I suggest you opt for a bronze tone that will define, not overpower the look that we are shooting for (or should I say brushing for).

5. Brush a hint of shimmer under the brow and in the inner corner of the eye. This will again enhance the smokey lash line and help frame the eye. Remember, when working with dark, you also want to introduce light.
6. To finish off my fall favorite look, apply a luxurious mascara to both the upper and the lower lashes. Don't be stingy. Nothing is sexier, more youthful, and more daring than extreme lashes. There are enough things in the world to be cautious of, and a mascara wand is not one of them.
There you have it my loves, the first taste of fall: playful, yet realistic smokey eyes. Risky without being risque is always the key when it comes to a modern classic like this. Get our your brushes and go for it! Have fun! Be bold.....but remember, remember, my darlings, to always blend!
Until next time...
XOXO