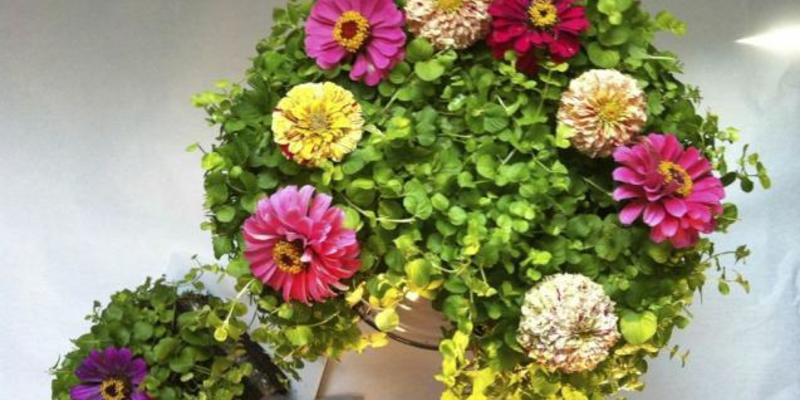

Ready for my latest DIY? I like to call this “Jenny’s Favorite Chocolate Cake” because the vine growing on the exterior is called Creeping Jenny. The water pics on top of the cake allow it to be "iced" with coordinating flowers for every occasion. See? Now you can grow your own cake... Enjoy!
{ Ingredients needed }
1 small bag of nutrient-rich potting soil
1 small bag of perlite
1 roll of Instant Green sheet moss
Hot glue sticks
Hardware cloth
6 floral water pics
6 4-inch pots of Creeping Jenny
1 10-inch cardboard cake round
Cut flowers to ice cake
{ Tools required }
Pencil
Sharpie
Yardstick
Watering can
Gloves
Glue gun
Floral pins
Roll of wire
Wire snips
{ Instructions }
1. Find the center of cake round and measure a slice that is about 1:6 in size.

2. Cut the slice out. This will serve as your template.

3. Lay template on hardware cloth, trace, and cut out using snips.

4. This will be the base of your cake. Cut out the slice, as well.

5. Cut two rectangles to serve as the sides of your cake—8"X40" cake wall and 8"X16" for the slice.

6. Fold the 8"X16" hardware cloth rectangle to form a slice shape. Use cardboard as a template.

7. Secure the slice with wire.

8. Secure the slice wall section to the base using wire.

9. Wrap and secure the cake wall to the cake base using wire.

10. Insert cardboard template to form a base.

11. Cut 8"X30" rectangle of sheet moss and hot glue to outside of cake. Overlap on edges. Do not glue moss on interior sides of slice. See next photos for visual detail.

12. Detail: Folded edge in cake.

13. Detail: Edge to be folded on top of cake

14. Detail: Edge folded on top of cake

15. Time to add the mix—I mean soil.

16. Fill with soil to about 1:3.

17. Tamp and level the soil layer.

18. Add the layer of icing (aka perlite), about 1 1:2 inches

19. Tamp and level the icing.

20. Plant 4 pots of creeping jenny in cake and one in the slice. Fill with soil and add water pics where you would like your flowers to be.

21. Water your cake.

22. Place flowers in water pics.

23. And Voila! You have a growing cake! Use floral pins to tact vine to surface of the cake as it grows.


Copyright © 2015 Dez Inc. dba GulfStream Communications